Monday, August 29

Mango make some salsa!


So I've had this recipe that is a Tim-Kroll-original I've been waiting to pull out for a while now. I think 126 days is sufficient time to let your excitement build.  I even had several thousand people email me daily, and so after much thought I have decided to share this goodness to the world.

It is very rare that I get such strong cravings as this one, but I think it was because this was destined to happen..or something like that.  I had a hankering for mango salsa.  Now don't laugh, especially because I don't think I had ever had this craving before and it was new to me too.  To be honest, I didn't even know how to make it.  But that is where fun and creativity come in and makes cooking so much fun and adventurous.  I read up on various styles of mango salsa and made what sounded like a winner of a recipe!

I know you can't wait any more and I've run out of ways to stall, so here is my now world famous Mango Salsa recipe:

TK Mango Salsa
Ingredients
1 ripe, chopped mango (medium to large) 
2 chopped Roma tomatoes
1/4 cup finely sliced red onions
1 minced, deseeded, small jalepeno (add more if you like spice)
1 tablespoon sweet chili sauce
2 teaspoons lime juice
2 teaspoons sliced cilantro
1/2 teaspoon salt (add more to taste)

Take the mango and chop it into small, bite-size pieces (we like our salsa chunky, so we cut our mango into bigger pieces).  An easy trick for cutting a mango is to stand it up right and cut two pieces off on just either side of the center pit.  Score the mango fruit into smaller pieces (but not through the peel) and turn the fruit inside out to cut the fruit away from the peel.  I then cut as much fruit off the pit as I can. 

Remove the seeds from the tomato and chop into similar sized pieces and add to the mango. Finely slice the red onions and add to the mango and tomatoes.  Remove the seeds from the jalepeno and mince it up and toss in with the other ingredients.  Add the sweet chili sauce, lime juice, cilantro and salt and stir salsa together.  Let it sit for at least 15 minutes to let the flavors combine and get happy.  Congratulations, you have now made the world a happier place with your mango salsa!

As you can see in the pictures we enjoyed the salsa with some fish tacos, but it can be enjoyed with chips, rice and beans, fish filets, and really most anything that needs a little something extra.  

Let me know what you think!  Oh, and don't worry, you won't have to wait 126 days for the next recipe...promise....cross my heart (but won't hope to die and stick a needle in my eye as that is a little gruesome,  isn't it? So I won't, I'll just promise).


Monday, April 25

Green Eggs and Ham...


Food should be fun.  As a child it is part of your job description, “Must have an excellent knowledge of how to play with food and make parents upset.”  Dr Seuss knew how to write to his audience.  As I kid I loved wondering what it would be like to eat green eggs that even the pickiest of picky eaters liked despite whining and insisting he wouldn’t.  When I saw a recipe for green deviled eggs I was intrigued to say the least.

I decided to have the green eggs accompany our Easter lunch as a side and it was a great choice.  Who knows…maybe a tradition in the making!

Again, I looked at the recipe Food Network provided and added my tiny twist (mostly because I didn’t have some of the ingredients on hand).

I will be surprised if after you try these bad boys you say “I do not like green eggs with ham, I do not like them Tim-the-man.”  If you can and do, you must sit on a throne of lies. These were just so good:

Green Deviled Eggs
Ingredients
5 hard-boiled eggs
1/2 sliced avocado
1/3 cup sliced cilantro
1/4 cup Miracle Whip
2 teaspoons Dijon mustard
1/2 teaspoon red wine vinegar
1 small clove of minced garlic 
(the smaller the garlic chunks the better, 
your friend eating 
next to you will appreciate it)
salt and pepper to taste
Ziploc sandwich bag
Paprika to garnish

Directions
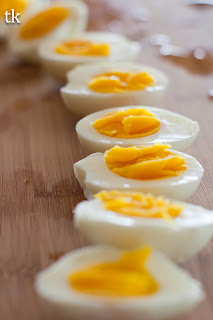
Place eggs in a cooking pot and cover with cold water until the water level just covers the eggs.  I placed the pot on the oven and as soon as the water came to a boil I quickly removed from heat and let it stand for 15 minutes.  If your stove top heats water quickly you might want to add a couple minutes to that time; if your stove top heats the water slowly (like mine) you might want to cut a minute or two off that time.  Rinse the eggs in cold water and remove the shells. I found that gently cracking the egg all over before trying to remove the shell helps out in the long run.

Now with a non-serrated knife, cut the eggs in two.  Carefully remove the yolk into a mixing bowl.  Combine the sliced avocado, cilantro, Miracle Whip, mustard, vinegar, garlic and salt and pepper in the mixing bowl.  Mix all items together until it is evenly combined.

Take a Ziploc sandwich bag and spoon the deviled egg filling inside it.  Once you have all deviled egg filling in the sandwich bag, seal it and cut a very small hole in a corner (and really I mean no bigger than a ¼ inch across).  Use the sandwich bag like a frosting bag and fill in the empty egg white halves.

Lightly dust with the paprika and serve the delicious, kid-friendly dish.

Asharae and I noted that they also reminded us of Christmas because of the red from the paprika, so we still aren’t sure what time of year these will be consumed, but maybe, just maybe they will be a bi-annual event.

So in the wise words of Dr. Seuss, “If you never did you should.  These things are fun and fun is good.” 


Tuesday, April 19

Mmm...Burger


The other day as Asharae and I were enjoying a nice sunny walk in our neighborhood when we caught a whiff of something that smelled wonderful.  I instantly found myself wanting to find the source.  I thought if I throw on some charm, maybe wink at them, smile, and see if I could get a bite of whatever it was that smelled so good.  But then I thought I might be perceived as creepy or just plain weird.

Most of the time good ‘ole burgers are the source of that familiar smell; on our walk it smelled like shrimp fettuccini, but that’s beside the point.  The point is, I like burgers.  And what is not to like? 

Bobby Flay is known for his grilling skills so I knew I had to start with him.  He has this great recipe for an Arthur Avenue Burger, but I decided to give it my own twist:

Tim’s South of the Border Burger
Ingredients
1 cup grated parmesan cheese
2 teaspoons all-purpose flour
1 lb 80 percent lean ground beef
1 small minced serrano pepper
¼ cup thinly sliced green onions
1 teaspoon black pepper
1 teaspoon kosher salt
1 ½ tablespoons canola oil

Directions 
To make the fricos (crunchy cheese discs), combine the parmesan and flour in a bowl. Heat an 8-inch nonstick pan over medium-high heat. Add 3 tablespoons of the cheese mixture and cook until light brown on the bottom. Turn over with a spatula and continue cooking until crispy. Remove to a plate to cool. Wipe out the pan with a paper towel and repeat.
Combine the ground beef, serrano pepper, green onions, and olive oil. Dive in there with your hands and mix it all together.  Divide the meat into equal portions (I did 3). Form each portion loosely into a 3/4-inch-thick burger and make a deep depression in the center with your thumb (it is a Bobby Flay trick). Season both sides of each burger with salt and pepper.  Heat canola oil in a sauté pan or griddle until it starts to shimmer.  Cook the burgers until golden brown or slightly charred (I did it for 2 ½ min or so) and then flip burgers and cook for until the other side is golden brown or slightly charred (around 3 minutes for me).  Remove the burgers and let them sit to the side covered by aluminum foil for 5 minutes.
We toasted our buns to make them more delicious.  Place the burgers on top of the bottom bun and place a cheese frico on top.  We then topped our burger with a dollop of some delicious Peach-Pineapple Salsa (store bought…sorry) and finished it with some fresh lettuce leaves.  
Consume immediately.

The fricos added a great crunch and the sweet salsa was a great compliment to the spicy burger. 
Remember: Don’t feel like you need to follow this recipe to a “T” (for Tim); feel free to add your own twist on your burger canvas and you might just surprise yourself with the masterpiece you create…


Saturday, April 9

BBQ Pot Stickers


Have you ever had a craving for a specific food?  You know, where you have the thought, “_______ sounds so good right now!” Unfortunately, I’ve found that when I have those moments, I’m usually craving food that is too difficult/too time consuming to make on my own.  And then I settle for Ramen noodles.  Now don’t get me wrong, I save a lot of money that way, but my taste buds aren’t nearly has pleased as my wallet is.  This time I decided to buddy up to my taste buds and try to make what I was craving…Pot Stickers.  Challenge accepted.

One of my favorite appetizers has to be Pot Stickers.  As I searched for recipes online, I found an intriguing one at Food Network made by The Neelys (one of my favorite TV chefs).  The hardest part of this recipe had to be finding the wonton wrappers.  I seriously had to wander around two grocery stores until I finally found the wrappers hiding in a back corner, but it was so worth it.  I followed The Neelys recipe, but made some slight changes which are in the recipe below.

BBQ Pot Stickers
Ingredients
1/2 pound ground pork
1/4 cup finely chopped green onions
2 cloves garlic, finely chopped
2 tablespoons of your favorite BBQ sauce
1/2 teaspoon sugar
1/2 teaspoon paprika
1 teaspoon yellow mustard
Dash Worcestershire sauce
Dash hot sauce
Kosher salt and freshly ground black pepper
25 to 30 small square wonton wrappers
Canola oil, for frying
1 cup chicken stock

Directions
In a medium bowl, add the ground pork, green onions, garlic, BBQ sauce, sugar, paprika, mustard, Worcestershire, hot sauce, salt and pepper. Mix together with a spoon until incorporated.

Lay a few wonton wrappers at a time out on your work surface. Cover the others with a damp paper towel to keep them from drying out. Dip your finger in a small dish of water and brush the edges of the wrapper lightly with water. I took a teaspoon measurement and scooped the filling into the center of the wonton.  Next, add a drop of BBQ sauce, approximately a teaspoon, on top of the filling. Bring two opposite wrapper corners together so it creates a triangle.  Press the edges of the wrapper together to seal it and take the two corners along the longest side and fold infront of the wonton so that it looks like an open envelope.  Repeat until all the filling is used.

Heat a large skillet over medium heat. Add just enough canola oil to cover the bottom of the pan. Once hot, add the dumplings to the pan. Make sure they are not touching or crowded together. Let the dumplings cook, for 2 minutes. Add 1/3 cup of the chicken stock and cover. Reduce the heat to low, and allow the dumplings to finish cooking by steaming, another 2 to 3 minutes. Once done, gently remove the dumplings from the pan. 

Repeat with the remaining dumplings. Transfer to a serving platter and serve with a dish of soy sauce for dipping.  Enjoy and eat until you crave no more!

I say we passed this challenge with flying colors and earned a couple of gold stars.  This would be a great recipe to entertain with, or just whip up when you have that Pot Sticker craving…I know I will, especially now that I know where the won tons are hiding!


Tuesday, March 29

Food for Thought...

Oh, well hello there.  My name is Tim. I am the captain to this delicious, non-stop flight towards a scrumptious happy-ever-after. As newlyweds, my wife and I were told that we shouldn’t expect to eat well early on.  Supposedly, Fact: Newlyweds don’t eat well, unless they’ve got a good take-out restaurant around the corner.  Cook? Hah.  My mom cooks, sure, but me…us?

Why not?

So with much encouragement from my wife, and some friends, I am starting this blog to help out the masses (insert massive applause and standing ovation here).  This is a blog for college students, college graduates, newlyweds, non-newlyweds or even people who have just celebrated 50 years together and want to try something different (and hopefully delicious!).  I want to start simple and see what happens from there.

I first want to make it very clear, I am by no means a culinary student and nowhere near a professional chef.  I admire people who have pursued their dreams in that way, but for me, I don’t think I could ever work at a restaurant or be a personal chef or have a catering company.  I just love food.

I hope that the fact that I have no technical background encourages you to dream, be creative, and, of course, have fun as you cook.  So in the words of the Iron Chef chairman: "Allez Cuisinez!”, which for you non-Food Network people I guess means “Go to the Kitchen!” in bad French.